7 Rookie Moves Passengers Make Going Through Security

It's more than a little loose change: According to the TSA, passengers left nearly one million dollars at security checkpoints in fiscal year 2018. While that might be good news for the agency, which plans to use the money for training agents, it's not such great news for passengers.
The top airport for cash left behind, according to TSA's news release? New York's JFK, where TSA collected over $72,000. Next up was Los Angeles' LAX, at over $71,000, while in third place was Miami (MIA) at just over $50,000. Passengers who might have managed to win at the tables also lost a lot at Las Vegas' McCarran (LAS) airport, leaving behind $33,000 at the TSA checkpoints to put the airport at number eight on the TSA's Top 10 list.
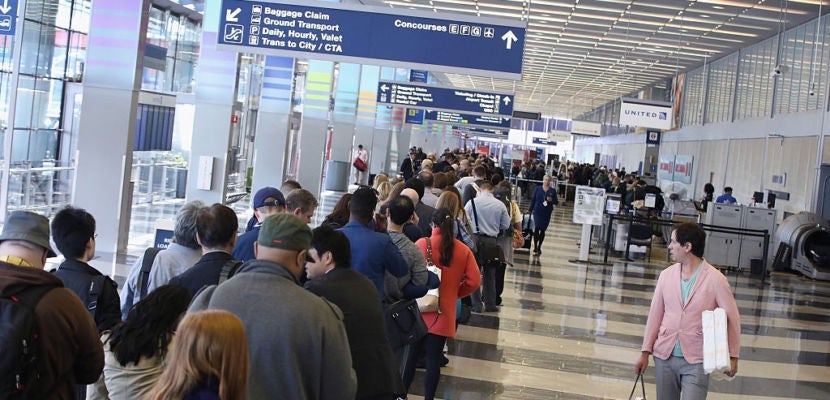
For non-frequent fliers, airport security can be a nerve-wracking experience. Even with TSA agents shouting their constant refrains of "No liquids, gels or aerosols" and "anything larger than your cellphone must come out of your bag," knowing exactly what to do and how to do it can still be confusing.
Related: The 7 Best Starter Travel Credit Cards
While fliers may find some variations between airports and TSA agents on any given day, there are some general, if unspoken, rules that can help you can breeze through security like a seasoned road warrior.
Here are a few common airport security mistakes to avoid, so you can get through security and on to your gate like a pro.
Picking the Wrong Security Lane
The first thing you will need to understand is which security lane you need to enter. Do you have TSA PreCheck? Are you flying in First or Business Class? Do you have any type of status with an airline? All of these questions will help you determine which security lane you can use.
Be sure to check your boarding pass. All the information you need will be listed there. If your boarding pass says TSA PreCheck, head over to the PreCheck lane. Some airports also have designated lanes for certain airlines' passengers who are flying in First or Business class or for those who have status with the airline, so be sure to take a look around for those as well, or ask when checking in if the option is available. Both PreCheck and so called "priority security" lanes can save you time if you can use them. If you can't, you need to head over to one of the standard TSA checkpoint lanes. Making sure that you are in the right lane will ensure that you don't have to move to another lane at some point, and start the process over again.
Well before you reach the TSA agent who will check your ID and boarding pass, have those items out and in your hand. If you are using a mobile boarding pass you will need to place your phone screen down on the scanner as directed. Note that TSA agents won't touch your device, so be ready to drop it on the scanner yourself.

Not Taking Everything out of Your Pockets
A large piece of lint can be enough to ping the body scanner so be sure to remove EVERYTHING from your pockets, including loose change, lip balm, your paper boarding pass or anything else. The easiest way to deal with this is to put everything in your bag. As a matter of habit, I clean out my pockets before I ever get into the security line. It means you're less likely to leave something at the checkpoint like that loose change the TSA is collecting for training, and allows you to grab your bag once screened without worrying that you left something behind.
Mishandling Large Electronics
Any electronic items larger than your cellphone — laptops, tablets or gaming systems — must be placed in a bin by themselves with nothing on top of them. If you have a laptop and a tablet with you and both can fit in a single bin without touching you're fine, otherwise grab another bin. As for your cellphone, put it in your bag and leave it there until you are through the checkpoint.
What exactly qualifies as a "large electronic item" seems to vary a bit from airport to airport and even from TSA agent to TSA agent. As a photographer, I often travel with a DSLR camera and lenses. Most of the time, I can leave these items in my carry-on bag with no problem. However, there are days where TSA agents either have asked me to remove at the very least the camera body — and on occasion all of the lenses as well — from my bag, or the bag has been dinged for a full hand search after going through the X-ray. I have found no rhyme or reason as to why it happens; it really seems to be up to the TSA agent at the time.
Removing Belts, Shoes, Coats and Jewelry
Belts as a general rule need to be removed. Easy solution: Take yours off and put it in your bag ahead of the checkpoint. Outerwear will need to come off and go in a bin. Watches as a general rule will need to be removed, but not earrings, necklaces or rings. (Again if you are concerned about them, take them off and put them in your bag.) Remove your shoes and place them directly on the belt. Shoes do not need to go in a bin on their own.
Breaking the 3-1-1 Rule
For your toiletry items, follow the TSA 3-1-1 rule: You are allowed one quart-sized bag with containers no larger than 3.4 ounces (or 100 milliliters). Your 3-1-1 bag needs to be taken out of your luggage for screening and can go in any bin except the one with your large electronic items. If you have liquids, gels or aerosols that don't fit in or meet the requirements of your 3-1-1 bag, they will not be allowed through the checkpoint, so either don't pack them to begin with, put them in any checked luggage or toss them out well before you get to the screening checkpoint. You can take things like water bottles through security as long as they are empty, then refill once you are airside.
Note that you must stay with your items until they are on the belt and headed into the X-ray machine. If you leave your items too quickly, a TSA agent may call you back over to stand with your items until they hit the final belt. Just keep sliding your items forward until they are all on the final belt, then step over to the body scanner.
Disregarding Full-Body Scanner Directions
Once your items have hit the belt its time to step over to what will most likely be a full-body scanner. The biggest thing here is step all the way up to the body scanner. Most people hang back which really crowds the security area. Wait for your turn on the mat just outside the scanner itself.
Once a TSA agent calls you into the scanner, step in an assume the position. Look down to make sure your feet are on the yellow footprints, look up and place your hands over your head like the decal on the scanner itself. You will then see a large bar move around you before you are asked to step out. Simple. The TSA agent will then ask you to wait on the other side as they review your scan. If you are clear you can head over to the belt to grab your stuff.
If the TSA agent needs to check something, don't freak out. You might have left something in your pocket by accident, or they need to inspect the necklace you might be wearing. Some TPG staff even report that they have certain items of clothing that, no matter what, will set off the body scanner. Most likely it's nothing to worry about. The TSA agent will quickly pat down the area, confirm you're not carrying anything dangerous and clear you to go grab your stuff from the belt.
Not Collecting Your Items
Once the TSA agent has cleared you it's time to gather your items. If you have followed this primer, the process should be a simple one. If you have a bunch of bins you can help keep the process moving for other passengers by stacking your bins as you empty them, creating space for other passengers and for the items constantly flowing out of the X-ray machine.
Grab your items and then move away from the conveyor belt to compose yourself. There are always tables and seats just past the checkpoint where you can repack your bag, put your belt back on, slip back into your shoes and grab those small items like your cellphone back out of your bag. By moving away from the conveyor belt you can take your time and double check that you have everything without holding up the line or forcing other passengers to wait to gather their own items.
Bottom Line
Clearing security at the airport doesn't have to be a stressful event. Doing simple things like cleaning out your pockets and removing your belt before you get in line will make the process move faster, not only for you but also for those passengers around you. Remembering that you don't need to grab an extra bin for your shoes but do need to finish that water in your water bottle before you go through can also keep things moving along. A little forethought and advance planning can make the process simple and smooth for yourself and those passengers behind you in line.
If you really want to make things easy on yourself apply for TSA PreCheck, which allows you to leave your items in your bag, keep your coat and shoes on, and pretty much just stroll through security. If you are wondering if your airline is a part of TSA PreCheck you can take a look at our Definitive Guide to All Airlines Offering TSA PreCheck. If you're looking to get TSA PreCheck for free there are a number of credit cards that offer a statement credit for signing up for TSA PreCheck.
For the latest travel news, deals, and points and miles tips please subscribe to The Points Guy daily email newsletter.
TPG featured card

at American Express's secure site
Terms & restrictions apply. See rates & fees.
| 4X | Earn 4X Membership Rewards® points per dollar spent on purchases at restaurants worldwide, on up to $50,000 in purchases per calendar year, then 1X points for the rest of the year. |
| 4X | Earn 4X Membership Rewards® points per dollar spent at US supermarkets, on up to $25,000 in purchases per calendar year, then 1X points for the rest of the year. |
| 5X | New! Earn 5X Membership Rewards® points on prepaid hotel stays booked through AmexTravel.com or the Amex Travel App. |
| 3X | Earn 3X Membership Rewards® points on flights booked through AmexTravel.com, the Amex Travel App, or purchased directly from airlines. |
| 2X | Earn 2X Membership Rewards® points on prepaid car rentals booked through AmexTravel.com or the Amex Travel App and cruises booked and paid through AmexTravel.com. |
| 1X | Earn 1X Membership Rewards® point per dollar spent on all other eligible purchases. |
Pros
- Valuable dining and food-related credits
- Flexible rewards with airline and hotel transfer partners
- Multiple travel and purchase protections
- No foreign transaction fees
- Access to Amex Offers for additional savings (enrollment required)
Cons
- Not as useful for those living outside the U.S.
- Some may have trouble using Uber and other dining credits
- You may be eligible for as high as 100,000 Membership Rewards® Points after you spend $8,000 in eligible purchases on your new Card in your first 6 months of Card Membership. Welcome offers vary and you may not be eligible for an offer. Apply to know if you’re approved and find out your exact welcome offer amount – all with no credit score impact. If you’re approved and choose to accept the Card, your score may be impacted.
- Earn 4X Membership Rewards® points per dollar spent on purchases at restaurants worldwide, on up to $50,000 in purchases per calendar year, then 1X points for the rest of the year.
- Earn 4X Membership Rewards® points per dollar spent at US supermarkets, on up to $25,000 in purchases per calendar year, then 1X points for the rest of the year.
- New! Earn 5X Membership Rewards® points on prepaid hotel stays booked through AmexTravel.com or the Amex Travel App.
- Earn 3X Membership Rewards® points on flights booked through AmexTravel.com, the Amex Travel App, or purchased directly from airlines.
- Earn 2X Membership Rewards® points on prepaid car rentals booked through AmexTravel.com or the Amex Travel App and cruises booked and paid through AmexTravel.com.
- Earn 1X Membership Rewards® point per dollar spent on all other eligible purchases.
- Pay It® lets you tap in the American Express® App to quickly pay for small purchase amounts throughout the month and still earn rewards the way you usually do. Plan It® gives you the option to split up big purchases into equal monthly payments with a fixed fee. You’ll know upfront exactly how much you’ll pay.
- Updated! $120 Dining Credit: Earn up to a total of $10 in statement credits monthly when you pay with the Gold Card at Grubhub (including Seamless), Buffalo Wild Wings, Five Guys, The Cheesecake Factory, and Wonder. This can be an annual savings of up to $120. Enrollment required.
- $100 Resy Credit: Get up to $100 in statement credits each calendar year at over 10,000 qualifying U.S. Resy restaurants after you pay for eligible purchases with the American Express® Gold Card. That’s up to $50 in statement credits semi-annually. Enrollment required.
- $84 Dunkin' Credit: Earn up to $7 in monthly statement credits after you pay with the American Express® Gold Card at U.S. Dunkin’ locations. Enrollment required.
- $120 Uber Cash on Gold: Enjoy up to $120 in Uber Cash annually with your Gold Card. Just add your Card to your Uber account and you'll get $10 in Uber Cash each month to use on orders and rides in the U.S. when you select an Amex Card for your transaction.
- New! As an American Express® Gold Card Member, you can enjoy complimentary Hertz Five Star® Status. Enjoy benefits like skipping the counter at select locations, adding an additional driver at no additional cost*, and vehicle upgrades**. Benefit enrollment and Hertz Gold+ registration are required. *Additional drivers must meet standard rental qualifications and must be a spouse or domestic partner to qualify as complimentary. Other additional drivers subject to fees. **Benefits are subject to availability and vary by location. Additional Hertz program Terms and Conditions including age restrictions apply.
- Take advantage of a $100 credit towards eligible charges* at over 1,300 upscale hotels worldwide when you book The Hotel Collection through AmexTravel.com or the Amex Travel App **. *Eligible charges vary by property. **The Hotel Collection requires a two-night minimum stay.
- Book your travel through the Amex Travel App with added peace of mind – backed by American Express® service and support. Only for American Express® Card Members.
- Whenever you need us, we're here. Our Member Services team will ensure you are taken care of. From lost Card replacement to statement questions, we are available to help 24/7.
- No Foreign Transaction Fees.
- Annual Fee is $325.
- Terms Apply.