4 Essential Tips for Photographing Beautiful Sunsets Around the World

According to data collected by SpaSeekers — an interactive website where users can view sunset photographs from around the world in real-time — some destinations are simply more popular for sunset 'gramming than others.
By analyzing nearly 286 million images of sunsets from the last year, the site determined that California, Sicily and Bali are the three places where sunset shots are most commonly shared. The European cities Paris and London also landed on the list — as did Moscow, Russia (No. 7 on the list). The top 10 destinations were rounded out by Sydney, Mumbai, Ibiza and the island of Phuket.
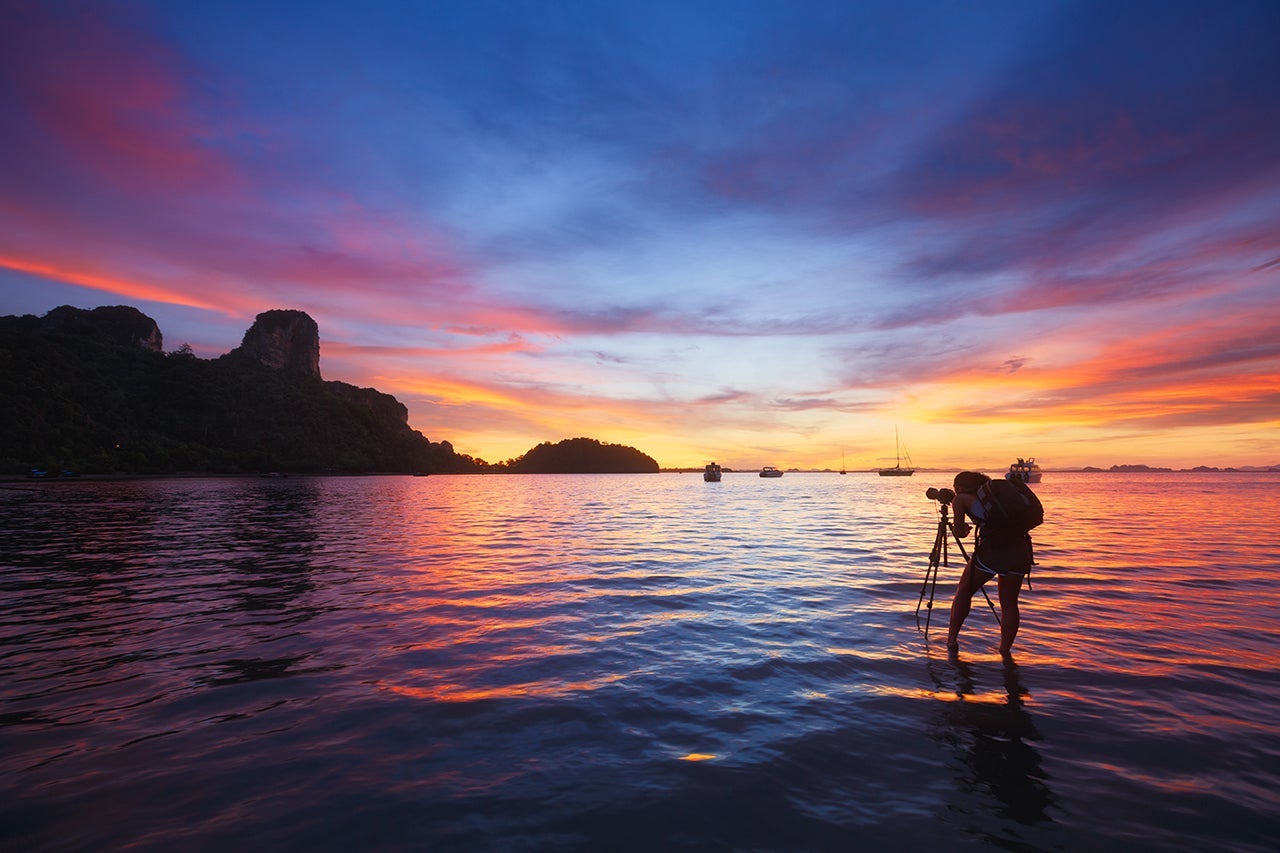
With so many sunsets flooding social media, travelers need to up their game to stand out. Fortunately, you don't need a professional camera to capture gorgeous photos of the sun dropping below the horizon — though it does help.
Purchase an entry-level DSLR, like Nikon's D3400, which can be purchased for as little as $400, which will help you control details most phones won't (depth-of-field, for example, or color tone and light sensitivity).
Make your sunset photos stand out above the rest with these basic tips at some of the best sunset destinations around the world.
Follow the rule of thirds

One of the most basic rules of photography, regardless of whether or not you are shooting on an iPhone or a DSLR, is the rule of thirds, which states that a subject should (almost) never be centered in the frame. When looking through the viewfinder, imagine a grid that is split horizontally and vertically in thirds (some DSLRs actually have a feature that does this for you), and experiment with positioning the sun in the upper and lower third of the frame, to the left or to the right. Generally, a more interesting sky would be reason to position the horizon on the lower third, making the sky dominant in the photo, whereas a visually pleasing landscape may justify positioning the horizon on the upper third.

Where to practice: Trapani, on the western coast of Sicily, is a great place to search for a sunset photo. Head just outside the city to shoot the sun setting behind the windmills of the salt pans. The windmills and sunlight reflecting off the water make for an interesting landscape, so when thinking about the rule of thirds during composition, try positioning the horizon in the upper third of the frame.
Experiment with your exposure
An overarching trend seen often in "lifestyle" photography is over-exposure (think: a slower shutter speed or larger aperture that lets in more light, creating a brighter photograph, but often blowing out the sky with white highlights). On the other end of the spectrum is under-exposure, which will create a more distinct sky and colorful sunset, but can easily present the issue of a darker foreground. DSLR cameras are equipped with a light-meter that indicates whether or not a photo is over (indicated with a positive symbol), under (indicated with a negative symbol) or perfectly exposed. Shoot photos on both ends, adjusting the shutter speed and aperture accordingly. You can also set your camera on the "cloudy" white-balance setting to bring out the reds and oranges of the setting sun.
Where to practice: Head to a rooftop cafe in Paris and shoot the sun setting behind the Eiffel Tower and the city's skyline. Try under-exposing the photograph to accentuate the sky's colors, and experiment with creating a silhouette using the tower and buildings in the foreground.
Determine a depth-of-field
The depth-of-field, or how much of the photograph you would like to be in focus, can be controlled by adjusting the aperture, or size of the hole that lets in light. The aperture is frequently referred to as the f-stop, which is read as f/2.8, f/4, f/5.6 and so on. As the number increases, the aperture decreases, resulting in a larger depth-of-field. A smaller aperture must be balanced out with either a slower shutter speed to let in more light, or an increased ISO, which controls the camera's sensitivity to light. When shooting a general sunset photo in which you want the entire landscape to be in focus, it is better to use a smaller aperture. If you are shooting a subject in the foreground that you would like to be the main focus of your photograph, try a larger aperture in order to blur the background. Ready for a challenge? Create a "sunburst" effect by setting your camera to f/22, use a lower ISO (100 to 200) and adjust the shutter speed accordingly as the sun dips below the horizon.
Where to practice: California has rocky coastline, mountains and sandy beaches; all serve as ideal landscapes for shoot with the setting sun as a backdrop. (This is probably why it was the single most-photographed sunset destination on Instagram.) For a shot that is slightly different than your typical "palm tree on a sandy California beach" photo, head to Yosemite National Park to shoot the surrounding hills, or down into the valley to capture the reds and oranges of the setting sun reflecting off the granite cliffs and cascading waterfalls. Be sure to use a larger depth of field in order to capture the landscape in its entirety.
Use a tripod
Stability and consistent composition are hard to achieve without a sturdy tripod. And as the light decreases, it will be necessary to use a slower shutter speed. But doing so will capture any motion at all, resulting in a blurry photograph. A tripod ensures sharp photos in low-light conditions (make sure your vibration reduction, or VR setting, is switched off). Another benefit of using a tripod is that it allows you to experiment with different camera settings without the composition of each shot being altered. This can be especially useful during post-production, if you would like to combine multiple photographs of different exposures in order to create a single image.
Where to practice: Tanah Lot, in Bali, is a must-visit destination for those looking to capture an incredible sunset. This sacred temple sits on a large rock that extends into the ocean, making it the perfect location to experiment with a tripod. Use a small aperture and slow shutter speed (or a larger aperture with a neutral-density filter) in order to capture the motion of the waves with the setting sun in the background.
TPG featured card

at American Express's secure site
Terms & restrictions apply. See rates & fees.
| 4X | Earn 4X Membership Rewards® points per dollar spent on purchases at restaurants worldwide, on up to $50,000 in purchases per calendar year, then 1X points for the rest of the year. |
| 4X | Earn 4X Membership Rewards® points per dollar spent at US supermarkets, on up to $25,000 in purchases per calendar year, then 1X points for the rest of the year. |
| 5X | New! Earn 5X Membership Rewards® points on prepaid hotel stays booked through AmexTravel.com or the Amex Travel App. |
| 3X | Earn 3X Membership Rewards® points on flights booked through AmexTravel.com, the Amex Travel App, or purchased directly from airlines. |
| 2X | Earn 2X Membership Rewards® points on prepaid car rentals booked through AmexTravel.com or the Amex Travel App and cruises booked and paid through AmexTravel.com. |
| 1X | Earn 1X Membership Rewards® point per dollar spent on all other eligible purchases. |
Pros
- Valuable dining and food-related credits
- Flexible rewards with airline and hotel transfer partners
- Multiple travel and purchase protections
- No foreign transaction fees
- Access to Amex Offers for additional savings (enrollment required)
Cons
- Not as useful for those living outside the U.S.
- Some may have trouble using Uber and other dining credits
- You may be eligible for as high as 100,000 Membership Rewards® Points after you spend $8,000 in eligible purchases on your new Card in your first 6 months of Card Membership. Welcome offers vary and you may not be eligible for an offer. Apply to know if you’re approved and find out your exact welcome offer amount – all with no credit score impact. If you’re approved and choose to accept the Card, your score may be impacted.
- Earn 4X Membership Rewards® points per dollar spent on purchases at restaurants worldwide, on up to $50,000 in purchases per calendar year, then 1X points for the rest of the year.
- Earn 4X Membership Rewards® points per dollar spent at US supermarkets, on up to $25,000 in purchases per calendar year, then 1X points for the rest of the year.
- New! Earn 5X Membership Rewards® points on prepaid hotel stays booked through AmexTravel.com or the Amex Travel App.
- Earn 3X Membership Rewards® points on flights booked through AmexTravel.com, the Amex Travel App, or purchased directly from airlines.
- Earn 2X Membership Rewards® points on prepaid car rentals booked through AmexTravel.com or the Amex Travel App and cruises booked and paid through AmexTravel.com.
- Earn 1X Membership Rewards® point per dollar spent on all other eligible purchases.
- Pay It® lets you tap in the American Express® App to quickly pay for small purchase amounts throughout the month and still earn rewards the way you usually do. Plan It® gives you the option to split up big purchases into equal monthly payments with a fixed fee. You’ll know upfront exactly how much you’ll pay.
- Updated! $120 Dining Credit: Earn up to a total of $10 in statement credits monthly when you pay with the Gold Card at Grubhub (including Seamless), Buffalo Wild Wings, Five Guys, The Cheesecake Factory, and Wonder. This can be an annual savings of up to $120. Enrollment required.
- $100 Resy Credit: Get up to $100 in statement credits each calendar year at over 10,000 qualifying U.S. Resy restaurants after you pay for eligible purchases with the American Express® Gold Card. That’s up to $50 in statement credits semi-annually. Enrollment required.
- $84 Dunkin' Credit: Earn up to $7 in monthly statement credits after you pay with the American Express® Gold Card at U.S. Dunkin’ locations. Enrollment required.
- $120 Uber Cash on Gold: Enjoy up to $120 in Uber Cash annually with your Gold Card. Just add your Card to your Uber account and you'll get $10 in Uber Cash each month to use on orders and rides in the U.S. when you select an Amex Card for your transaction.
- New! As an American Express® Gold Card Member, you can enjoy complimentary Hertz Five Star® Status. Enjoy benefits like skipping the counter at select locations, adding an additional driver at no additional cost*, and vehicle upgrades**. Benefit enrollment and Hertz Gold+ registration are required. *Additional drivers must meet standard rental qualifications and must be a spouse or domestic partner to qualify as complimentary. Other additional drivers subject to fees. **Benefits are subject to availability and vary by location. Additional Hertz program Terms and Conditions including age restrictions apply.
- Take advantage of a $100 credit towards eligible charges* at over 1,300 upscale hotels worldwide when you book The Hotel Collection through AmexTravel.com or the Amex Travel App **. *Eligible charges vary by property. **The Hotel Collection requires a two-night minimum stay.
- Book your travel through the Amex Travel App with added peace of mind – backed by American Express® service and support. Only for American Express® Card Members.
- Whenever you need us, we're here. Our Member Services team will ensure you are taken care of. From lost Card replacement to statement questions, we are available to help 24/7.
- No Foreign Transaction Fees.
- Annual Fee is $325.
- Terms Apply.